How to wrap a product with honeycomb paper, step by step
How to wrap with honeycomb paper: pull it fully open, cut the right length, roll, close the ends and lock the tail without tape. Plus common mistakes.
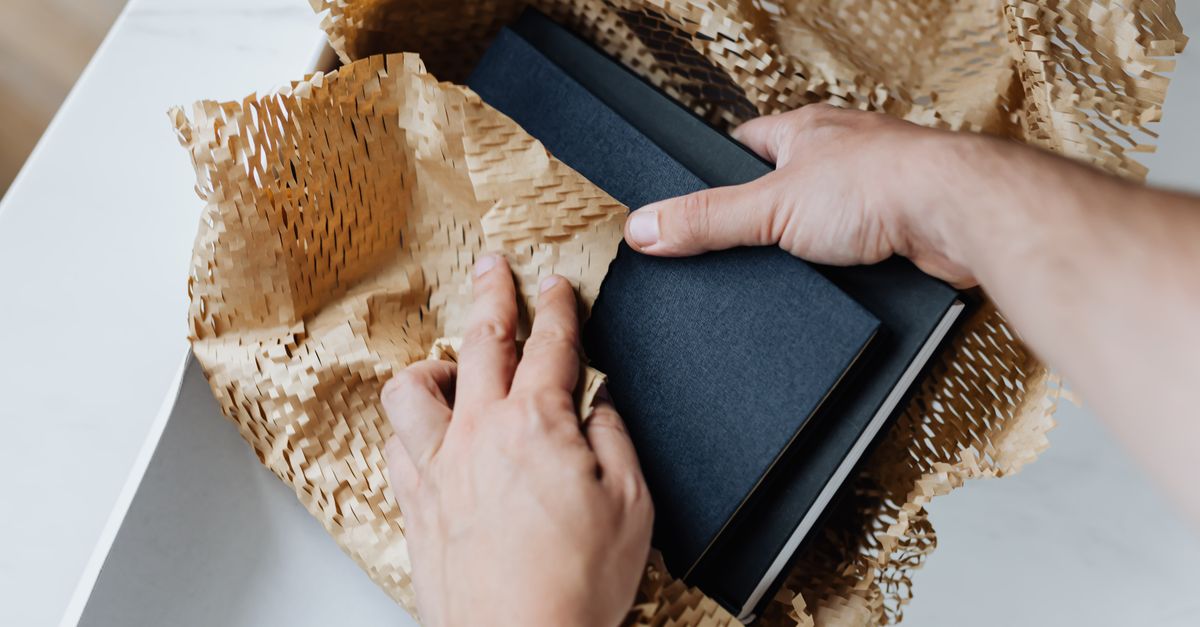
To wrap with honeycomb paper, pull it against the dispenser until the cells open fully, tear off a sheet long enough to go round the item the number of times you need plus a small overlap, and roll the item up in it. Fold or twist the ends over the top and bottom, then press the tail onto the wrap so the cells lock together. Most light items need no tape. Finish with a shake test, in the hand and in the box.
It looks simple, and it is.
A good wrap and a poor one usually come from the same roll. The difference is how far the packer pulls the paper, and what happens to the ends.
Before you start
Check two things before the first wrap.
- Width. Honeycomb paper gets narrower as it opens, so measure the opened width, not the roll on the shelf. The opened sheet should be wider than the item is tall, with enough extra to fold over both ends. Our guide on what honeycomb paper is explains why it narrows. We make standard widths from 100 mm to 500 mm, and 12, 15 and 20 inch rolls for American buyers, so there is usually one that suits your product.
- Tension. If the cells come out half-open, no technique will save the wrap. Set the dispenser first. Our guide to dispenser tension covers it.
If the item has a glossy or soft finish, put a layer of tissue interleaf on first. The cut edges of the honeycomb can mark a high-gloss surface, particularly lacquered wood, polished metal and glazed ceramics.
We also supply honeycomb paper in white and in colours, if the wrap is part of the unboxing.
The wrap, step by step
1. Work out the sheet length once
Measure round the item at its widest point. Multiply by the number of turns you want, and add about a hand-width for the overlap.
Worked example: a candle jar 30 cm round, wrapped in two turns, needs about 30 × 2 + 10 = 70 cm of opened paper.
Mark that length on the bench with a strip of tape.
Then nobody has to measure again, and the paper used per item becomes predictable instead of individual.
2. Pull it fully open
Pull smoothly and steadily, at one speed, until the paper reaches your bench mark. Look at the sheet. The cells should be open evenly from edge to edge.
A jerk tears the paper. A lazy pull leaves it half-flat.
We test every sample lot in our plant with exactly this pull, on a dispenser, at a packer's normal speed. A roll that opens badly in a packer's hand is a bad roll, whatever its specification sheet says.
3. Tear it off cleanly
Tear against the dispenser's edge with a short, firm movement. If you tear by hand, hold the paper at the tear point with one hand and pull down with the other.
Keep the sheet stretched as you move it. If you let it go slack, some cells close part of the way again.
4. Place the item
Lay the item at the near end of the sheet, in the middle of the width. Leave the same amount of paper sticking out on both sides. Those are your ends.
5. Roll it up
Roll the item away from you, keeping a light tension on the paper. Firm, not tight. If you pull the wrap tight like a bandage, you squash the cells you just opened, and squashed cells do not cushion.
I would rather see a slightly loose wrap than a strangled one.
6. Close the ends
Fold the spare paper over the top and the bottom of the item. For a bottle or a jar, twist it gently like a toffee wrapper and push the twist into the hollow. For a box shape, fold it like a gift.
I think the ends matter more than any other step. Formal drop tests hit corners and edges for a reason, and that is exactly where a lazy wrap leaves bare product.
7. Lock the tail
Press the last 10 cm or so flat onto the wrap underneath. The cells catch in each other and hold. Run your palm over it once.
For heavy items, add one short strip of paper tape.
Two strips is a sign the wrap is too loose.
8. Shake it
Hold the wrapped item and shake it. Nothing should slide, and the wrap should not open. Then put it in the box, close the flaps and shake again. If you hear anything move, add void fill or use a smaller box.
Different shapes
The same eight steps work for most products. I would only change how you treat the ends and the weak points.
| Item | What changes |
|---|---|
| Bottle or jar | Twist the ends into the hollows. Give the neck and the base extra paper, because they take the knocks |
| Mug with a handle | Fill the gap inside the handle with a small twist of paper first, then wrap the whole mug |
| Plates and flat items | Wrap each one on its own. Never let two glass or ceramic faces touch |
| Box-shaped items | Fold the ends like a gift. Make sure all eight corners are covered |
| Odd shapes | Wrap the most fragile part first, then wrap the whole item |
| Sets of small items | Wrap each one, then wrap the group together into one parcel |
Common mistakes and how to fix them
| Mistake | What happens | Fix |
|---|---|---|
| Paper not fully opened | Thin, flat wrap that barely cushions | Set the dispenser tension, pull steadily |
| Wrap pulled too tight | Cells flatten, cushioning falls | Firm hand, not a bandage pull |
| No overlap | Wrap opens in the box | Add a hand-width every time |
| Ends left open | Corners and ends land bare | Fold or twist every end |
| Two items in one wrap | Glass or ceramic knocks against glass or ceramic | One item, one wrap |
| Big gaps in the box | Item rattles, wrap wears through | Smaller box or void fill |
The box still matters
Honeycomb paper protects the item. It does not fill the box.
I would never trust the wrap alone. A wrapped item that can slide across a half-empty carton will still break.
UPS's own packaging guidelines ask shippers to wrap all items separately and to use at least two inches (about 5 cm) of cushioning between items and the sides, top and bottom of the box. Your courier's rules may differ, so read their page too. But the idea holds everywhere: wrap each item, then stop it moving.
How many layers?
That depends on the weight and how fragile the item is. Our separate guide to how many layers of honeycomb paper gives starting points and a way to test them.
One honest limit
We make honeycomb paper, and I will still say it plainly. It is not for everything. Very heavy items with sharp corners can cut through it, and items that may sit wet for weeks need a different plan. For those, test hard before you switch.
Make it the same every time
I would choose a packing room where every packer wraps the same way over a faster one where everyone does it differently. Write the sheet length and the number of turns for each product on a card at the bench. Our guide to training packers has a 30-minute routine for new staff.
If you would like to try this on your own products, ask us for a sample roll or a pack of pre-cut sheets through our contact page. Tell us what you ship, and we will suggest a width to start with.
Questions buyers ask
Do I need tape to hold honeycomb paper in place?
Usually not for small and medium items. The cells of the tail catch in the cells underneath and hold. For heavy items, or a wrap that will be handled a lot before boxing, one short strip of paper tape keeps it closed.
Can I use pre-cut sheets instead of a roll?
Yes. Our pre-cut sheets are 390 x 500 mm, about 50 cm off a roll each. Pull a sheet open by hand, in the same direction it would come off a dispenser. They suit a small bench with no dispenser.
Should I place the item straight or diagonally on the sheet?
For round items, straight. For box-shaped items, some packers lay them at an angle so the corners pick up more paper. Try both on ten items and keep whichever gives you the better shake test.
Can customers reuse the wrap?
Often, yes. If the cells are still open and the paper is not torn, it can wrap something else. When it is finished, plain honeycomb paper can usually go in paper recycling.